What You’ll Learn
- How to pick the right dual monitor setup type for your workflow
- Exact monitor positioning — height, distance, and angle — to prevent neck strain
- Step-by-step connection and OS configuration for both Windows and Mac
- Workflow optimisation tricks that make dual monitors feel like one seamless canvas
- The most common dual monitor mistakes remote workers make — and how to avoid them
The short answer: Learning how to set up dual monitors for remote work correctly starts with avoiding the most common mistake: placing both screens at mismatched heights and angles, forcing your neck and eyes to constantly readjust. The fix takes under 20 minutes — position your primary monitor directly in front at eye level, place your secondary monitor at the same height angled slightly inward, and configure your OS display settings so cursor movement between screens feels natural. Below, we walk through every step.
What You Need Before You Start
Before you touch a single cable, gather everything. Nothing kills momentum like discovering you’re missing an adapter halfway through.
- Two monitors — ideally matching resolution and size. Mismatched 1080p + 4K creates jarring scaling issues.
- Video cables — HDMI, DisplayPort, or USB-C depending on your laptop/desktop ports. DisplayPort handles higher refresh rates better than HDMI for identical resolution.
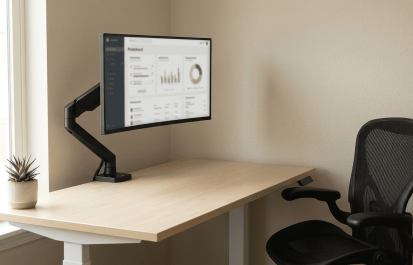
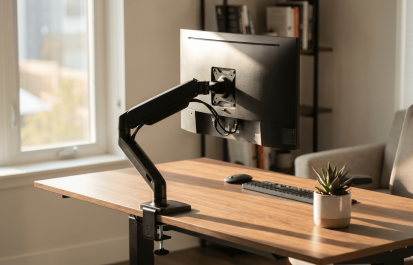
- A monitor arm (recommended) — frees desk space and gives you millimeter-precision height and angle control. If using stands, make sure both monitors have adjustable-height stands.
- Docking station or USB-C hub — most laptops have one video-out port at most. A hub or dock gives you the extra ports.
- Tape measure or ruler — you’ll use this for positioning. Exact measurements make the difference between “fine” and “I can work 8 hours without a headache.”
Step 1 — Choose Your Setup Type
Dual monitors aren’t one-size-fits-all. Your setup type depends on what you do all day.
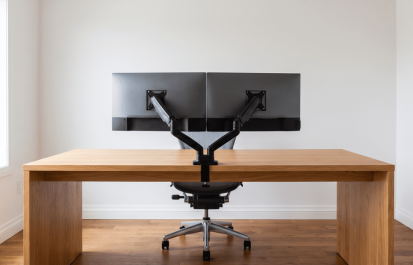
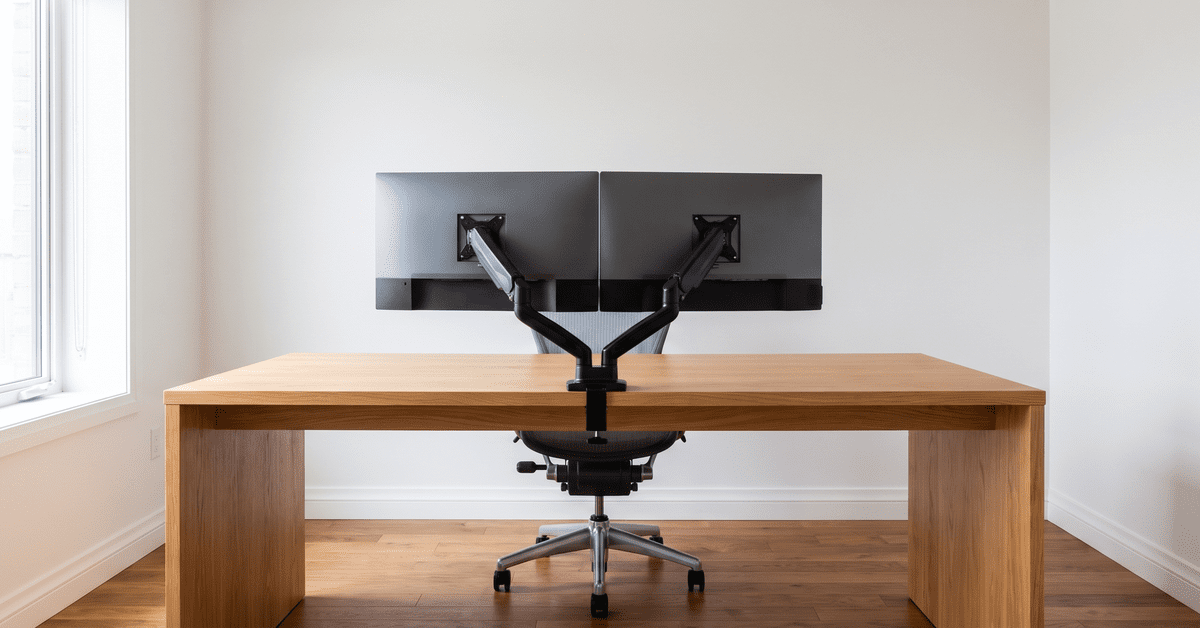
Side-by-Side (Most Common)
Two monitors placed horizontally next to each other. Best for: general productivity, coding, writing, research — any workflow where you reference one screen while working on the other. Place your dominant screen centered in front of you, and the secondary off to one side at a 15–30° inward angle.
Stacked (One Above the Other)
One monitor mounted directly above the other. Best for: developers who like terminal on bottom + docs on top, traders, or anyone with limited desk width. The ergonomic tradeoff is real — looking up repeatedly can strain your neck. Keep the top monitor tilted downward 10–15° and position your task-critical screen on the bottom.
Primary/Secondary (One Big, One Small)
One large main monitor (27″+”) for focus work, one smaller secondary (portable monitor or laptop screen) for Slack, email, or reference material. Best for: writers, designers, anyone whose primary app demands full-screen attention. Place the primary directly in front; tuck the secondary to the side. If you’re debating between this and a single ultrawide vs dual monitors, the primary/secondary layout gives you the focused-immersion benefit of an ultrawide with the flexibility of a separate reference screen.
Step 2 — Position Your Monitors Correctly
This is where most people get it wrong — and where the ergonomic payoff lives. Spend 10 minutes getting these measurements right and your neck will thank you for years.
Height
The top of your monitor screen should be at or slightly below eye level. For most people, this means the top bezel sits roughly 0–2 inches below your direct line of sight. If you’re tilting your head up to read the top of the screen, the monitor is too high — your neck muscles are working against gravity all day. If you’re looking down sharply, you’ll hunch forward and compress your cervical spine.
Distance
Arm’s length. Sit back in your chair, extend your arm straight out — your fingertips should just touch the screen. That’s roughly 20–28 inches for most people. Closer than that and your eyes work harder to focus; farther and you’ll lean forward unconsciously, undoing your chair setup.
Angle
For side-by-side: place the bezels touching, angle both monitors inward slightly (10–20° each), and sit centered at the seam. Your head should turn no more than 35° to either side. If you find yourself rotating your chair to read the secondary screen, bring it closer. For stacked: tilt the top monitor downward 10–15° so you’re looking slightly down at both screens rather than craning up.
A monitor arm makes micro-adjustments effortless. If you’re still using the factory stands that came with your monitors, you’re leaving ergonomic precision on the table — most fixed stands only adjust height in 1–2 inch increments, if at all.
Step 3 — Connect and Configure
Physical cables first, OS settings second. Here’s the order of operations that avoids the “why is my second screen black?” panic.
Cable Routing
Connect both monitors before powering them on. Use DisplayPort cables if your monitors support them — they handle daisy-chaining and higher refresh rates better than HDMI. If your laptop has one USB-C port and you need two external displays, a USB-C docking station with dual video-out is the cleanest solution. Route cables behind your desk or through a cable management tray. A clean desk isn’t just for Instagram — visible cable clutter is a low-grade cognitive distraction that adds up over 8-hour days.
Windows Display Settings
Right-click desktop → Display settings. You’ll see both monitors represented as numbered rectangles. Drag them to match your physical layout — if monitor 2 is to the left of monitor 1 physically, drag rectangle 2 to the left of rectangle 1 in settings. This makes cursor movement between screens feel natural rather than reversed. Under Scale and Layout, set both monitors to the same scaling percentage (125% or 150% are common for 1440p and 4K at desk distance). Set the refresh rate to the maximum your monitor supports under Advanced Display settings.
Mac Display Settings
System Settings → Displays. Click “Arrange” and drag the display icons to match your physical layout — same principle as Windows. Under each display, set the resolution to “Default for display” or choose “Scaled” for a custom size. Enable “Use as” → “Extended display” (not mirrored) unless you’re presenting. For color accuracy, calibrate both displays under the Color tab — mismatched color temperatures between screens is a subtle but real eye-strain trigger during long sessions. Apple’s display setup documentation covers troubleshooting if your Mac doesn’t detect the second monitor.
Step 4 — Optimise Your Workflow
Dual monitors are hardware. Turning them into a productivity multiplier happens in software.
App Assignment
Designate one screen as your “primary focus” and the other as “context.” If you write code, that means IDE on the main screen, documentation and terminal on the secondary. If you design, that means Figma on the main screen, briefs and Slack on the secondary. The rule: never put two attention-demanding apps on the same screen. Your brain can’t focus on two things simultaneously — what feels like multitasking is actually rapid context-switching with a cognitive tax.
Window Snapping
On Windows, press Win + Left/Right Arrow to snap windows to half-screen, or Win + Shift + Arrow to move windows between monitors instantly. On Mac, drag windows to screen edges or use Rectangle (free) or Magnet (paid) for keyboard-driven snapping. These shortcuts save the 2–3 seconds of manual window dragging — which adds up to roughly 15 reclaimed minutes per workday if you arrange windows often.
Taskbar Management
Windows: right-click taskbar → Taskbar settings → Taskbar behaviors → “Show taskbar on all displays.” Set “Show taskbar buttons on” to “Taskbar where window is open” so each screen shows only its own apps — less visual noise. Mac: System Settings → Desktop & Dock → “Displays have separate Spaces” (enabled by default in recent versions).
Common Dual Monitor Mistakes to Avoid
Even after following every step above, these silent mistakes can undermine your setup.
- Different resolutions at different scaling. A 1080p monitor next to a 4K monitor means your cursor “jumps” unexpectedly when crossing the bezel because the pixel density doesn’t match. Fix: set scaling so both screens display UI elements at roughly the same physical size, or use matching monitors.
- Using the wrong monitor as primary. Your primary monitor should be the one directly in front of you — not necessarily the bigger one. If your 27″” 4K screen sits off to the side while your 24″ 1080p sits center, you’ll twist your spine toward the 4K screen all day.
- Ignoring refresh rate mismatch. If one monitor runs at 60Hz and the other at 144Hz, Windows defaults both to 60Hz. Check each monitor’s refresh rate in Display settings — you may be leaving performance on the table.
- Mirroring instead of extending. Duplicate displays are for presentations, not daily work. Two screens showing identical content gives you zero productivity gain. Always use Extend mode.
- Placing monitors too far apart. Gaps between bezels that force head-turns larger than 35° create a “tennis match neck” — your cervical spine rotates back and forth hundreds of times a day. Bring them closer together, or better yet, use a dual monitor arm to eliminate the gap entirely.
Frequently Asked Questions
Do I need matching monitors for a dual setup?
No, but it helps. Mismatched monitors work fine for email + browser on the secondary screen. For color-critical work (design, photo editing) or if you regularly drag windows between screens, matching resolution, size, and panel type (IPS vs VA vs TN) prevents jarring visual discontinuity and scaling headaches.
Can I set up dual monitors with a laptop?
Yes — most laptops from the last 5 years support at least one external monitor via HDMI, DisplayPort, or USB-C. For two external monitors plus your laptop screen (triple-display), you’ll almost certainly need a docking station or USB-C hub with dual video-out. Check your laptop’s specs for maximum external display count before buying cables.
How do I stop my neck from hurting with dual monitors?
The neck pain culprit is almost always monitor height or angle. Both screens should be at eye level with the top bezel slightly below your line of sight. If you primarily use one screen 80% of the time and the other 20%, make the 80% screen your centered primary. The secondary screen’s inward angle should be shallow enough that you can see it with eye movement alone, not head rotation.
Is a dual monitor arm worth it?
Yes — a dual monitor arm frees roughly 30% more desk surface compared to two stands and gives you independent height, tilt, and rotation control per monitor. If you adjust your standing desk height during the day, a monitor arm moves with you instead of requiring separate re-adjustment.
What’s better — dual monitors or one ultrawide?
It depends on workflow. Dual monitors give you clear spatial separation between apps — code on one screen, docs on the other — which many people find mentally organizing. A single ultrawide eliminates the center bezel and feels more immersive for design and video work. See our full breakdown: ultrawide vs dual monitors.
Sophia Carter has spent years testing productivity tools and workspace setups. She helps remote workers build efficient home offices that support deep focus, ergonomics, and better workflows.