Ever feel that nagging ache in your lower back after a long day? Or maybe it’s the eye strain that creeps in, or just a general sense of fatigue that hits you way too early? If you’re working from home, you know your office is more than just a spot for your laptop. It’s your mission control, your creative space, the very heart of your productivity. But for many of us, it can also be a source of discomfort. What’s the usual suspect? A workspace that’s not really set up with you in mind.
It’s easy to think that setting up ergonomic home office budget limitations mean a truly comfy and supportive setup is out of reach. We often picture pricey chairs and fancy gadgets. But what if creating an ergonomic sanctuary—one that truly supports your body and helps you focus—is totally doable without emptying your pockets?
Well, you’re in the right place! This step-by-step guide is packed with the latest insights to help you do just that. We’re going to walk through practical, actionable, and super budget-friendly ways to turn your current setup into an ergonomic haven. Let’s ditch the idea that a healthy workspace is a luxury; it’s an accessible necessity, and we’ll show you how.
By the time you’re done here, you’ll have all the know-how to make smart, cost-effective choices. These changes won’t just ease discomfort; they’ll significantly boost your focus, well-being, and how much you get done. So, get ready to wave goodbye to those workspace woes and say hello to a more comfortable, productive you!
Why an Ergonomic Home Office Matters (Even When Budgeting)

So, why all the fuss about an ergonomic home office? Is it just about a fancy chair or a new desk? Not at all! Think of it as a fundamental investment in your overall health, your well-being, and even how well you do your job. Especially now, with so many of us working remotely, getting your workspace right—even on a tight budget—is super important. And the great news? Creating an ergonomic home office budget doesn’t mean you miss out on the good stuff. It just means making smart choices.
Let’s dive into why this is such a big deal. First up, your physical health. A well-designed workspace actively helps prevent those aches and pains that creep in after hours in a less-than-ideal posture. Imagine this: your spine nicely aligned, your lower back supported, and your wrists chilling in a neutral position. This setup can seriously cut down your risk of issues like back pain, a stiff neck, carpal tunnel, and other repetitive strain injuries (RSIs). These aren’t just little annoyances; they can turn into bigger problems that affect your life and work. An ergonomic setup is like your personal bodyguard against these issues.
But it’s not just about the body; your mind gets a boost too! When you’re comfortable and not in pain, your brain is free to focus. If you’re constantly fidgeting or feeling sore, it’s a major distraction and can lead to stress and a grumpy mood. An ergonomic environment, on the other hand, helps you feel calm and in control. This reduces stress and generally makes your workday more pleasant. And a happy mind? That’s directly linked to how well you can concentrate and tackle your tasks.
This naturally leads us to productivity. When you’re not constantly trying to find a comfy spot or taking breaks because something hurts, your focus can skyrocket. An ergonomic workspace is designed to support your body in its most efficient working posture. This means less fatigue and more energy for your actual work. The result? You get more done, the quality of your work improves, and you’re better equipped to handle those big projects.
There’s a common myth that getting these benefits means spending a ton of money. Let’s bust that right now! Ergonomics is really about smart design and thoughtful tweaks, and many of these cost very little or even nothing. It’s about understanding how your body interacts with your workspace and making changes—big or small—to make that interaction better. Plus, think about the long run: the money you save on potential medical bills and the boost in productivity far outweigh any small, initial investments you might make in your ergonomic home office budget. This guide is all about showing you how to make those impactful, cost-effective changes. A healthy, productive, and comfortable home office is totally within your reach!
Step 1: Assess Your Space, Needs, and Budget – The Foundation of Your Ergonomic Setup

Alright, before we even whisper the words “ergonomic chair” or “fancy monitor arm,” let’s talk about the absolute first step in setting up ergonomic home office budget success: a good old-fashioned assessment. Think of this as laying the groundwork. It’s about looking at your work habits, your body’s needs, the space you’ve got, and, of course, your finances. If you skip this, it’s like trying to build a house without a plan – you might end up with something, but it probably won’t be your dream home (office, in this case!). Taking a moment to assess now means every choice you make later, and every penny you spend (or save!), will directly help create a healthier, more productive workspace for you.
So, where to begin? Start with a little self-reflection on your current setup and how you use it. Ask yourself some honest questions:
- Where do you usually feel sore or uncomfortable after a workday? Is it your neck, back, wrists, or maybe your eyes?
- When does this discomfort usually kick in or get worse?
Understanding these pain points is super important. Next, think about your daily tasks. Do you spend most of your day typing away, hopping on video calls, or are you deep in detailed design work? What you do will shape your ergonomic priorities. Also, how long are you at your desk each day? A setup for a couple of hours of use will be different from one needed for a full eight-hour day or more. Finally, let’s get practical: grab a tape measure and find out the dimensions of your home office space. Knowing what you’re working with will help you figure out what can realistically fit and how to arrange it all.
Once you’ve got a handle on that, it’s time to define your ergonomic goals. Based on your self-assessment, what specific improvements are you hoping to make? Is your main aim to kick that back pain to the curb, reduce eye strain, or just create a more organized and focused zone? Clear goals will help you prioritize where to put your effort and any money you might spend. For example, if chronic back pain is your nemesis, sorting out your chair situation will be top of the list.
And now, the budget. This doesn’t mean you need to set aside a huge pile of cash. A big part of an ergonomic home office budget approach is figuring out how many improvements you can make for free or very cheaply. If you do have some funds, decide how to best use them. Generally, investing in a decent ergonomic chair (or seriously upgrading your current one) gives you the biggest bang for your buck in terms of comfort and health. After that, think about your desk and monitor. Be honest about what you can afford. Remember, this guide is all about getting the most ergonomic benefit with the least spending.
Here’s a great actionable tip for this stage: snap a “before” photo of your current workspace. It’s amazing what a picture can reveal! You might spot awkward postures, clutter, or bad lighting you hadn’t noticed. Plus, it’ll be a fantastic motivator as you see your ergonomic home office take shape. By carefully checking out your space, understanding your unique needs, and setting a clear budget, you’re building the perfect foundation for a home office that truly looks after you.
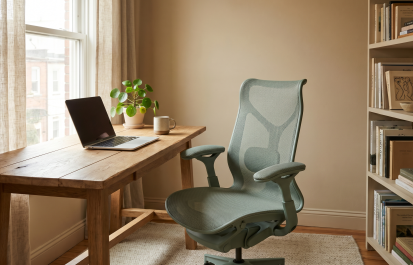
Step 2: The Ergonomic Chair – Your Throne of Comfort (Budget-Friendly Options)
Let’s talk chairs! If there’s one item where a little bit of smart spending (or a clever tweak) can make a HUGE difference in your setting up ergonomic home office budget journey, it’s your chair. Seriously, you spend hours sitting in it, and this single piece of furniture pretty much dictates your posture, your comfort, and ultimately, your ability to focus without those annoying aches and pains creeping in. High-end ergonomic chairs can have some scary price tags, right? But guess what? Getting a comfy and supportive seat doesn’t mean you have to break the bank. The trick is knowing what features really count and how to find them without overspending.
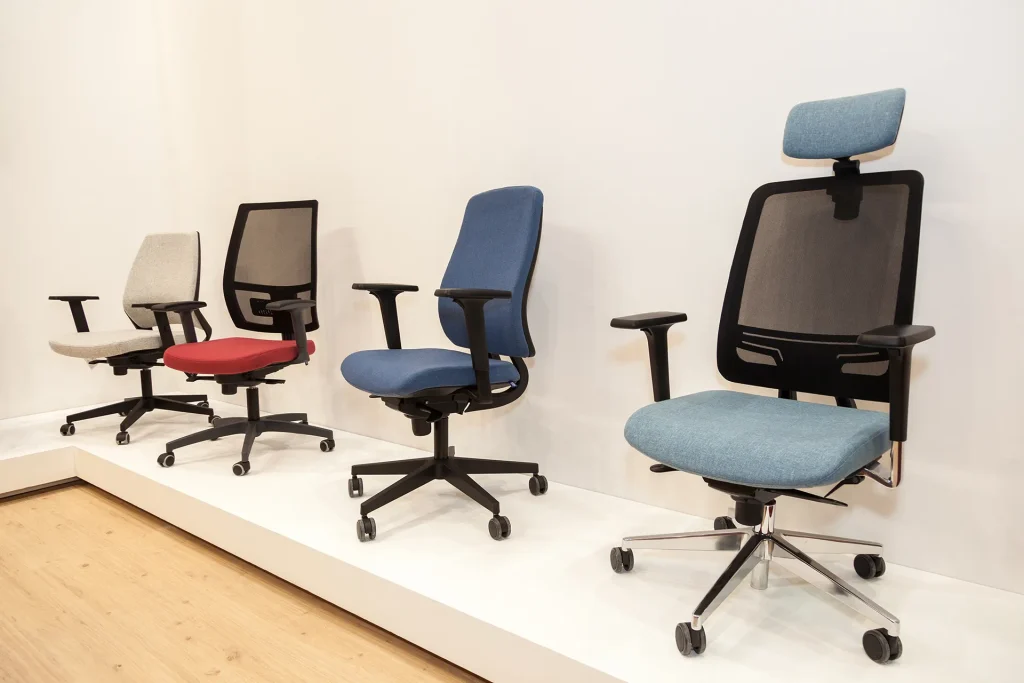
So, what makes a chair truly ergonomic? Let’s break it down:
- Adjustable Height: This is a must-have. Your feet should be flat on the floor (or a footrest), with your knees at a comfy 90-degree angle. Your arms? They should be able to rest easily on your desk, with your elbows also at about 90 degrees.
- Lumbar Support: Super important! Your lower back has a natural inward curve, and a good chair will have a curve or an adjustable bit to support this. This stops you from slouching and takes the strain off your back. If your current chair is lacking here, don’t worry! A rolled-up towel or a small, firm pillow placed just right can work wonders.
- Seat Depth and Width: You want to be able to sit with a few fingers’ width between the back of your knees and the edge of the seat. And, of course, it needs to be wide enough for you to sit comfortably without feeling squished.
- Armrests: Ideally, these should be adjustable in height and width. They help take the strain off your shoulders and neck. If your chair has fixed armrests that are too high or low, or none at all, just focus on keeping your shoulders relaxed and in a good posture.
- Swivel and Casters: These let you move around easily and reach different parts of your workspace without straining. Handy!
Okay, so how do you get these features on a budget? First stop: your current chair. Can you improve it? Like we said, DIY lumbar support is a great start. Maybe add a seat cushion for extra padding or to tweak your height a bit. Make sure all its adjustable bits are set up perfectly for your body.
If a new chair is on the cards, look for budget-friendly options that nail these core ergonomic features. You might not get all the fancy extras of a top-tier model, but many entry-level ergonomic chairs offer good adjustability and support. Dive into reviews, paying close attention to how durable they are and how well the adjustment bits work.
Another fantastic option? The second-hand market! Office liquidators, online spots like Facebook Marketplace or Craigslist, and even your local charity shops can be treasure troves for high-quality, used ergonomic chairs at a steal. If you go this route, give the chair a good once-over: check that all the levers and adjustments are working, the padding is still supportive, and the wheels roll smoothly.
Here’s a pro tip before you dash off to buy anything: spend a week really trying to optimize your current chair using these budget tricks. You might be amazed at how much better it can feel with just a few simple changes. Remember, the main goal in your setting up ergonomic home office budget is to find the best possible support for your body. This way, you can work comfortably and productively for a long, long time.
Step 3: Desk Setup – Finding the Right Height and Surface (Cost-Effective Solutions)
Okay, your chair is sorted and feeling good. What’s next in our setting up ergonomic home office budget adventure? Your desk! The height and surface of your desk are super important for your overall posture, comfort, and how efficiently you work. A desk that’s not quite right can lead to hunched shoulders, sore wrists, and a whole bunch of other aches. But don’t worry, getting an ergonomic desk setup budget-style doesn’t mean you need a fancy new desk. There are plenty of clever and affordable tricks up our sleeves!
First things first, what’s the ideal desk height? It all comes down to your seated posture. When you’re sitting correctly in your ergonomic chair (feet flat, knees at 90 degrees, remember?), your elbows should also be at a comfortable 90-degree angle when your hands are on your keyboard. Your shoulders should be relaxed, not hunched up or reaching. That’s the golden rule!
So, how do you nail this on a budget?
- Adjust Your Chair First: Always start by getting your chair height right.
- Footrest Needed? If adjusting your chair means your feet are now dangling, use a footrest. A stack of sturdy books or a dedicated, inexpensive footrest works perfectly.
- Desk Too Low? If your desk is too low and you can’t lower your chair any more without messing up your leg position, try using risers under the desk legs. Simple wooden blocks, a few reams of paper (make sure it’s stable!), or cheap furniture risers can do the trick.
- Desk Too High? Raising your chair is the first thing to try. If that’s not cutting it, or if it makes your feet lift too far off the ground even with a footrest, you might need to think about a lower desk. Or, a more budget-friendly idea is a keyboard tray that you can install underneath. This brings your keyboard and mouse down to the right height.
What about standing? It’s a big trend in ergonomics for a reason – it’s great for combating the downsides of sitting all day. But dedicated standing desks can be pricey. No worries, budget-conscious remote worker, we’ve got you!
- DIY Standing Desk Converter: Try using a sturdy box, a stack of books, or a small shelf placed securely on your existing desk. This can elevate your monitor and keyboard to standing height.
- Affordable Converters: For something a bit more polished but still easy on the wallet, look for manual standing desk converters. These are platforms that sit on your desk and can be raised or lowered. Simple, sturdy designs are your friend here.
Even just switching between sitting and standing for short periods can make a massive difference to your energy levels and reduce strain. If you are thinking of buying an affordable home office desk, look for basic, fixed-height desks that match your ideal seated height, or simple manual sit-stand frames where you can use your own desktop surface.
Lastly, let’s talk about your desk surface. It needs to be big enough for all your essentials – monitor, keyboard, mouse, and any papers you need – without feeling like you’re in a sardine can. A cluttered or tiny surface can lead to awkward reaching and a messy workflow. Maximize the space you have with some simple organization: keep only what you need daily on the surface, use vertical space with cheap shelving if you can, and make sure your main work tools are easy to grab. A clear, organized desk doesn’t just help your body; it helps your mind too, making your setting up ergonomic home office budget efforts even more effective!
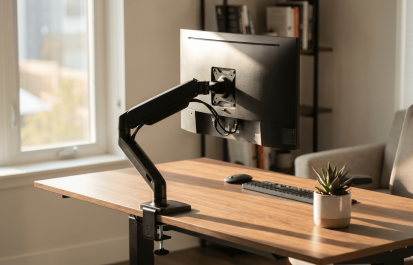
Step 4: Monitor Placement – Eyes on the Prize (Budget & DIY Fixes)
Now that your chair and desk are playing nicely together, what’s the next big piece of the puzzle in your setting up ergonomic home office budget? It’s all about where your monitor sits. If you’re staring at a screen that’s poorly positioned for hours on end, you’re basically signing up for neck pain, stiff shoulders, and some serious eye strain. Yikes! But here’s the good news: getting an ergonomic monitor setup budget-style is usually more about smart tweaks and easy DIY fixes than forking out for expensive gear.
Let’s get down to the nitty-gritty of correct monitor positioning.
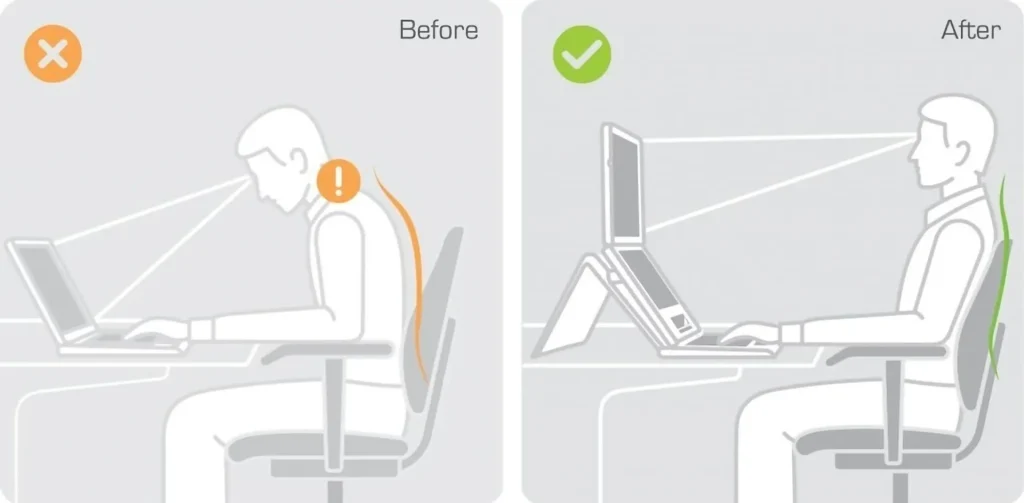
- Height is Key: The top of your screen should be at or just a smidge below your eye level when you’re sitting comfortably and looking straight ahead. This stops you from craning your neck up or hunching down.
- Distance Matters: Your monitor should be about an arm’s length away. A quick check? Sit back, stretch out your arm, and your fingertips should just about touch the screen. This distance helps keep eye fatigue at bay.
- Angle it Right: Ideally, your monitor should have a slight upward tilt, maybe around 10-20 degrees. This means your line of sight is hitting the center of the screen pretty much straight on, which can help cut down on glare and make viewing more comfortable.
So, how do you make all this happen without spending a fortune? For monitor height, the easiest and most budget-friendly trick is to use what you’ve got lying around. Sturdy books, a few reams of printer paper, or even a small, stable wooden box can make excellent DIY monitor stands. Just stack ‘em up until your monitor is at the perfect eye level. If you want something a bit neater but still affordable, there are plenty of simple, inexpensive monitor risers on the market. While dedicated monitor arms give you the most flexibility, really good budget-friendly ones that are also sturdy can be a bit harder to find. So, when you’re on a tight budget, focus on those stable DIY or riser solutions first.
Here’s a really important one for many home offices: laptop ergonomics. Working directly on a laptop for long stretches is an ergonomic no-go. Why? The screen’s too low, and the keyboard’s too close, forcing you into that dreaded hunch. The fix, even on a budget, is to treat your laptop more like a computer tower. Grab an inexpensive external keyboard and an external mouse. Then, pop your laptop up on a budget laptop stand (again, a stack of books or a dedicated cheap stand works great!) so the screen is at the correct eye level. This one simple change can make a world of difference to your posture and comfort.
And it’s not just about where the monitor is; it’s also about looking after your eyes. Actively work to reduce eye strain home office conditions. Ever heard of the 20-20-20 rule? Every 20 minutes, take a 20-second break to look at something 20 feet away. Also, tweak your screen brightness so it matches the light in your room – it shouldn’t be glaring like a lighthouse in a dark room, nor should it be so dim you’re squinting. Make sure your overall room lighting is good too, so your eyes aren’t working overtime. These little, free habits, along with a correctly positioned monitor, are your best friends for protecting your vision and staying focused all day. That’s how you make your setting up ergonomic home office budget efforts really pay off!
Step 5: Keyboard and Mouse – Your Hands’ Best Friends (Affordable Ergonomic Peripherals)

Let’s chat about your keyboard and mouse. These trusty tools are often forgotten in the grand plan of setting up ergonomic home office budget, but they’re how you interact with your digital world all day long! Spending hours typing and clicking with peripherals that are poorly positioned or just not right for you can lead to sore wrists, tingly fingers, and even conditions like carpal tunnel syndrome. Nobody wants that! The main goal of typing ergonomics on a budget is to keep your wrists in a nice, neutral posture and cut down on strain. And the good news? You don’t always need to splash out on expensive, specialized ergonomic gear to achieve this.
First things first: neutral wrist posture. What does that even mean? Basically, your wrists should be straight – not bent up, down, or sideways – when you’re typing or using your mouse. Imagine a straight line from your forearm through your hand. To get this right, where you place your keyboard is key. It should be close to your body, so your elbows can rest comfortably at your sides, making that nice 90-degree angle we keep talking about. No reaching for your keyboard!
Many keyboards have little feet at the back that tilt them upwards. For better ergonomics, it’s often a good idea to keep the keyboard flat, or even give it a slight negative tilt (angling away from you) if your setup allows. This can really help keep your wrists straight. Your mouse should be best buddies with your keyboard – place it as close as possible, on the same level. This stops you from overreaching and minimizes strain on your shoulder and wrist.
Now, what about finding a budget ergonomic keyboard or an affordable ergonomic mouse? The market is definitely offering more choices these days. While those fancy split or contoured keyboards and vertical mice can be great, they might be a bit of a stretch if you’re on a tight budget. But don’t worry, even standard keyboards and mice can be used in a more ergonomic way!
- Keyboard Choice: If you find yourself reaching too far for your mouse, look for compact keyboards. They cut down the overall width and can make a big difference.
- Mouse Choice: Even some budget-friendly mice offer slightly more contoured shapes than basic flat ones, which can give your hand better support.
Honestly, though, the most important thing is often how you use your standard gear. Try to type lightly, keeping your wrists relaxed and kind of floating, rather than resting heavily on any surface while you’re actively typing.
What if your wrists are still angling uncomfortably? A DIY wrist rest, like a soft, folded cloth placed in front of your keyboard (not to rest on while typing, but for those brief pauses), can sometimes help. But be careful here – the aim is to encourage that neutral posture, not to create a crutch that makes you rest your wrists in an extended position for ages. You can find truly affordable gel wrist rests, but just make sure they don’t lift your wrists too high.
Here’s a super actionable tip: get into the habit of doing regular hand and wrist stretches. Simple flexes and rotations every hour can do wonders for alleviating strain and boosting circulation. This makes your budget-friendly ergonomic setup even more effective!
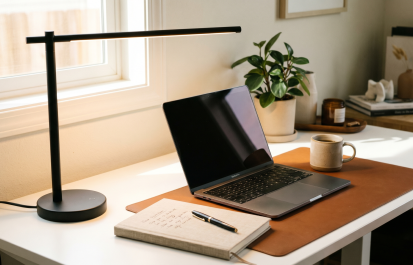
Step 6: Lighting and Ambiance – Setting the Mood for Productivity (Budget-Friendly Illumination)
Creating an ergonomic home office isn’t just about how you sit; it’s also about crafting an environment that’s kind to your eyes and helps you focus. This is where lighting and ambiance step into the spotlight in your setting up ergonomic home office budget. If your lighting is too dim or too harsh, you’re looking at potential eye strain, headaches, and that tired feeling. But a pleasant atmosphere? That can seriously boost your mood and productivity. And the best part? Optimizing your home office lighting budget and overall vibe often comes down to simple, low-cost tricks rather than fancy, expensive fixtures.
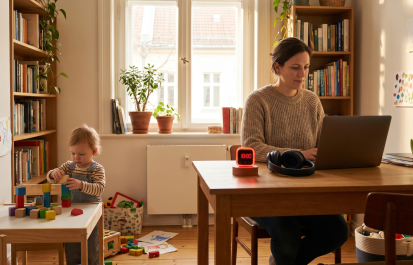
Let’s start with the MVP of office lighting: natural light. If you can, try to position your desk near a window. Daylight is the absolute best for reducing eye fatigue and can even help you sleep better and feel generally good. But, direct sunlight can cause glare on your screen, which is no fun. So, try to place your desk sideways to the window. If direct sunlight is still an issue, some sheer curtains or blinds can gently diffuse the light. This way, you get all the good stuff from natural light without the glare or too much heat.
What about when natural light isn’t enough, like during darker hours or if your room doesn’t have big windows? That’s where artificial lighting comes in. The goal is to supplement natural light effectively and make sure you have enough illumination for your tasks.
- Check Your Current Lights: Start by looking at your existing room lighting. Is it doing a good job, or are there shadows and dark spots in your work area?
- Task Lighting is Your Friend: For light directly on your desk, an affordable LED desk lamp is a fantastic investment. Look for one that’s adjustable in brightness and position. This lets you aim the light exactly where you need it – usually on your documents or keyboard, not shining right onto your screen.
- Position Wisely: Be careful where you place your artificial lights to avoid creating new sources of screen glare. You’re aiming for a balanced, comfortable level of brightness across your whole workspace, without harsh contrasts that can make your eyes work too hard.
Beyond just brightness, think about the overall ambiance. This is where ergonomic lighting solutions cheap can also mean creating a more pleasant and focused space. Have you heard of biophilic design? It’s all about bringing a bit of nature indoors, and it’s a big ergonomic trend that you can totally do on a tiny budget. A small, low-maintenance plant on your desk or a nearby shelf can add a touch of life and color. Studies even show that just looking at nature can reduce stress! You could also try a nature-themed screensaver or a calming desktop background. These little touches make your workspace feel less like a sterile box and more like a place you actually want to be, which helps you concentrate and feel good while you work. Remember, an ergonomic workspace looks after all aspects of your well-being, and a well-lit, pleasant environment is a huge part of that!
Step 7: Organization, Accessories, and Movement – Declutter and Optimize (DIY & Budget Ideas)
We’re almost at the finish line of setting up ergonomic home office budget! Now it’s time for those final touches that really bring everything together: organization, some essential accessories, and the super-important role of movement. These might seem like small things, but they transform your carefully arranged chair, desk, and monitor into a truly efficient and health-friendly workspace. And the best bit? You can achieve many of these upgrades with clever DIY ideas and very little cash.
First up, let’s talk clutter. A decluttered workspace often means a decluttered mind. Physical mess can actually make it harder to focus and can even add to your stress. So, where to start? Keep only the absolute essentials on your actual desk surface. For everything else, it’s time to get creative with home office organization budget solutions.
- Repurpose What You Have: Old jars or mugs? Perfect for pens! Shoeboxes? They can become great drawer organizers (maybe decorate them to make them look a bit nicer!). Simple shelves can lift items off your desk and free up space.
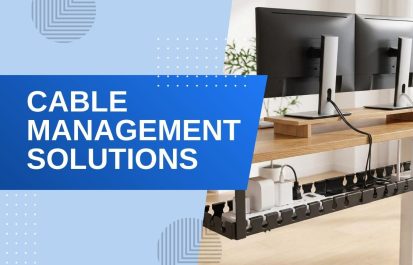
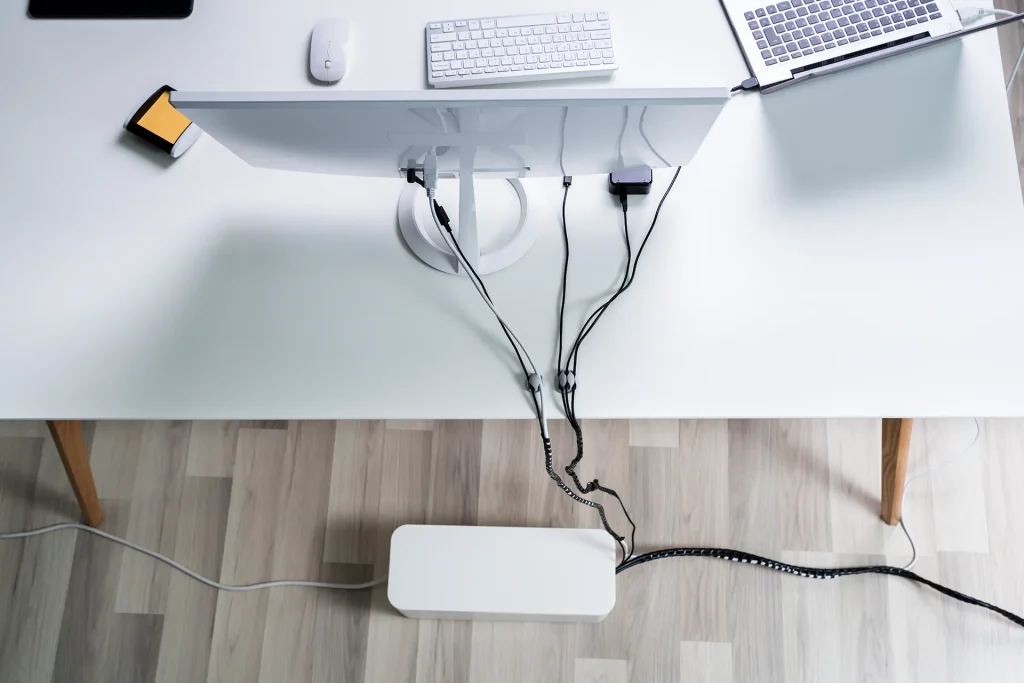
- Tame Those Cables: This is a big one, especially if you’ve got a lot of tech. Tangled wires don’t just look messy; they can be a trip hazard or lead to you accidentally unplugging something important. For budget cable management solutions, think simple: Velcro ties are your friends, binder clips run along the edge of your desk can guide cords neatly, or you can even use old toilet paper rolls to bundle up extra cable lengths. Inexpensive plastic cord concealers that stick to the underside of your desk or along your baseboards can also make a world of difference.
Next, let’s think about a few essential ergonomic accessories that won’t break the bank.
- Footrest Power: If, after getting your chair and desk just right, your feet don’t comfortably rest flat on the floor, a footrest is a must. You don’t need anything fancy; a sturdy box, a stack of old textbooks, or even a purpose-built but inexpensive plastic footrest will do the job perfectly. Its main role is to support your feet and help you keep that crucial 90-degree angle at your knees.
- Document Holder: If you often look at physical documents while you’re typing, a document holder can be a real neck-saver. It stops you from constantly looking down and then back up at your screen. A simple DIY ergonomic accessories solution could be a small, angled piece of wood or even a sturdy binder propped up. You can also find affordable clip-on document holders pretty easily.
Finally, and this is a big one, let’s get moving! No matter how perfectly ergonomic your setup is, staying glued to your chair for hours on end is not good for your health. The importance of movement remote work really can’t be stressed enough. Make it a habit to take regular short breaks – at least once an hour. Stand up, stretch, and move around a bit. Go get a glass of water, do a few simple stretches right there at your desk (think neck rolls, shoulder shrugs, wrist flexes), or just change your posture for a moment. You can set reminders on your phone or use free computer apps that prompt you to take these little micro-breaks. These small bursts of activity boost your circulation, reduce muscle stiffness, and can give your energy and focus a serious lift throughout the day. This commitment to regular movement is a free, yet totally invaluable, part of your strategy for setting up ergonomic home office budget effectively.
Conclusion: Your Ergonomic Oasis on a Budget is Within Reach!
So, you’ve made it through our guide to setting up ergonomic home office budget! It might have seemed like a big task at first, but hopefully, you can now see it’s totally doable and really worthwhile. You’re now armed with the knowledge and practical tips to turn your workspace into a super comfortable, healthy, and productive zone – all without needing to spend a fortune.
From figuring out your own needs and making smart tweaks to your chair and desk, to getting your monitor, keyboard, and mouse just right, plus sorting out your lighting and organization – every little change adds up to a much better work experience. It’s pretty cool, right?
Remember, the main idea behind ergonomics on a budget isn’t about buying loads of expensive stuff. It’s about clever design, thoughtful adjustments, and putting your well-being first. You have the power to create a supportive and energizing home office through these small, cost-effective steps. By trying out even a few of the ideas we’ve shared, you’re making a real investment in your long-term health, boosting your focus, and setting yourself up for more efficient workdays. That ergonomic oasis on a budget? It’s not just a dream – it’s totally within your grasp, starting right now.
What’s the first budget ergonomic tip from this guide you’re excited to try in your home office? We’d love to hear your plans! Share them, and any other brilliant budget-friendly ergonomic ideas you have, in the comments below. Let’s hear how you’re creating your perfect FocusModeHQ!
David Park researches and reviews productivity software, AI tools, and automation workflows. He helps professionals work smarter by finding the tools that actually deliver results.